

Creating Custom Video Sequence Sizes and Auto Reframing
- milesstewart
- Jan 20, 2021
- 3 min read
Updated: Mar 9, 2021
Today we will be looking at a few different techniques within Premier Pro, to change the sequence sizes for different resolutions of video or media, as well as re framing that footage, to fit within the new aspect ratio.
First of all, I will start with Creating custom video sequence sizes. The different sequence sizes are used to display different shapes and aspect ratios of footage, used on different websites and media devices. The example I will be using today is converting normal ratio landscape 1920 x 1080 footage, onto a square sequence size, 1080 x 1080, for use within Instagram, as this is the size Instagram uses. To start with, select file > new > sequence, and it should bring you up to this panel, where you then select settings;

From here the most important parts to change include the time base and display format, of which is what frame rate you recorded your footage in, these should both be the same value. The frame size is what you need to change for the different sequence sizes. The most popular sequence sizes can be found below;
1.) Instagram- Max= 1080 x 1080
2.) Facebook- Recommended= 1280 x 720
3.) Twitter- Horizontal Recommended= 1280 x 1024
4.) Twitter- Vertical Recommended= 1200 x 1900
5.) Snap chat- Recommended= 1080 x 1920
6.) Youtube- Varies.
(All values are in pixels)
You can then also save these presets for easier future use, of which is very helpful if you plan on doing more of this content in the future.

The timeline video preview box should now be the desired sequence size, for this instance, 1080 x 1080 pixels;

Next, after you have altered the sequence size of the premier pro file, the footage that you have collected might not be the correct size, for instance most landscape footage is recorded in 1920 x 1080, and once you insert it into a 1080 x 1080 sequence, it will be cropping out the sides of the video, and the framing will not be correct in the videos anymore, but there is an easy way to fix this, using the auto re frame tool within Adobe Premier Pro.
Place your footage into the correct sequence size within Premier Pro, and then select the footage, and then sequence > auto re-frame sequence and you should see this pop up.

From here you can choose the desired target aspect ratio (for the Instagram test I will use square 1:1 as Instagram using a square 1080 x 1080), motion tracking can be changed to fast or slow, but default is usually fine, and the clip nesting is whether you want transitions that have already been applied to be removed, but leaving it on don't nest clips is the best option for most scenarios.
Before I applied auto re-frame to the footage, this was the position of the skateboard ramp;
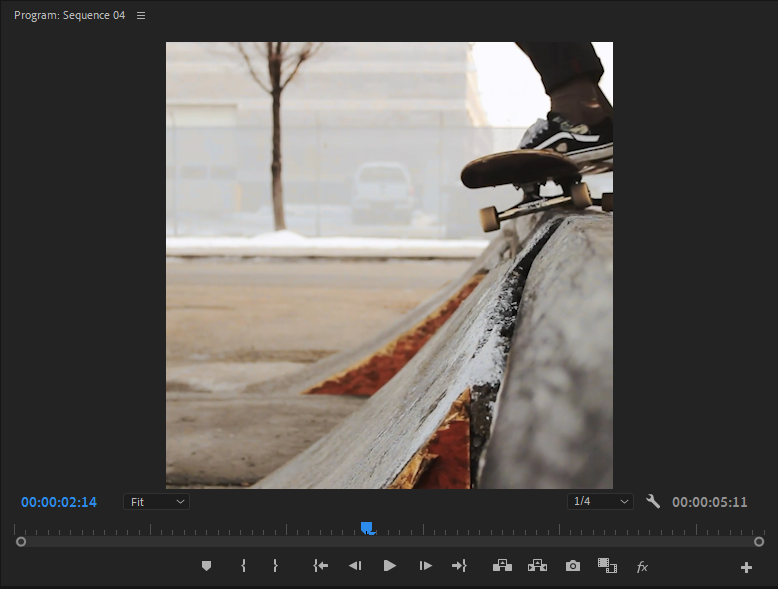
After I applied the auto re-frame to the footage, this was the position of the skateboard ramp;

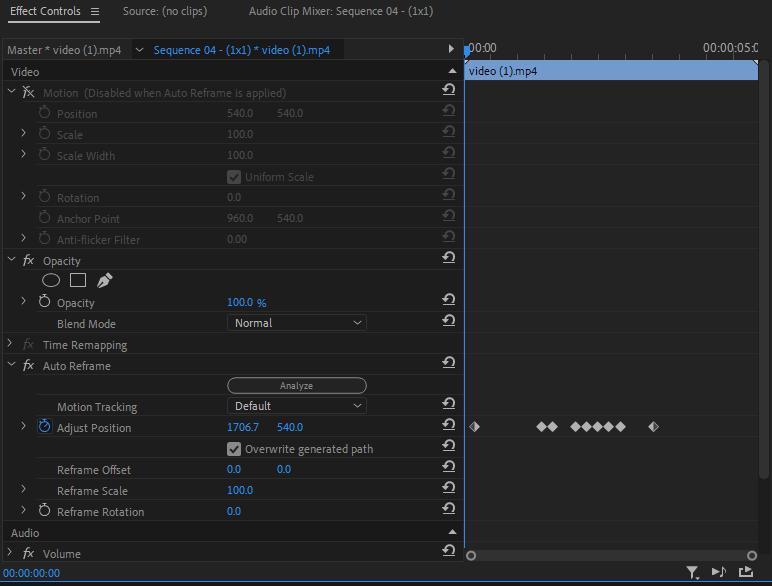
Sometimes, the auto re-frame tool doesn't properly adjust some scenes, such as the one I will show below.

To fix or adjust the auto re-framing, select the footage and go into effect controls, within here, there should be a new auto re-framing effect controls area, where you can then select overwrite generated path. Timestamps will show up, where you can alter the position of the timestamps, as well as changing the position of the footage at these timestamps, to make the footage centered properly within the new sequence size.
Changing the sequence settings, as well as auto re-framing the footage to the new sequence settings is very easy, ad very useful when dealing with all of the different social media sequence settings, of which are becoming increasingly more popular in the modern era.


Comments