

Monkey Suit: Development Journal
- milesstewart
- Mar 2, 2021
- 9 min read
This is my development journal, for the production of the 'Monkey Suit' by Ed Grover, lyric video. I have already completed a storyboard to follow, but I am already going to add a space scene at the end, as I didn't want to have problems with the animation of the monkey suit getting taken off at the previous end scene, an end scene with the monkey in space will be a good alternative.
Creating the Assets- I will be doing the animation, as well as the lyric production all within After Effects. But before we delve into the animation and setting up of the scenes, I will create all of the assets needed for this production, within Adobe Illustrator. My style of artwork and characters design is vector animation, and well simple artwork. Illustrator is the best for my type of work, due to the fact Illustrator works in vector art work which is neat, smooth and cartoony, but it also allows for easy transportation between other Adobe products, because vectors can be re-sized and manipulated easier than pixels, as less information is lost between transfers. In total, I have 9 main scenes, all well as in-between scenes, which I will work on at a later date. To begin this project, I will create these simple scenes within illustrator, using shapes, pen tool, and the combination of shapes. The 9 different scenes include;
1.)Cafe location long shot, with city-scape in background.

2.)Bar area inside the Cafe, with a big menu board to put lyrics onto.

3.)Table with coffee cup on it, with lots of space above coffee cup, so steam can come out, to create the lyrics.

4.) City scene, where monkey suit will walk across, as well as a few cars.

5.) City scene 2, where different cars will drive across, this scene leads to the desert so that will be showcased, as well as leaving lots of space above the cars, as this scene will contain the most lyrics on it.

6.) Desert scene. Long shot of money suit driving car through desert, with mountains in background.

7.) Space scene. This scene will be above the desert scene, so I need to make sure the colour is the same as the sky in scene 7. The components in this scene will be animated, so for now it is just a blank colour.

8.) Sea scene. This scene will need a large area for lyrics to flow. The monkey suit will be sitting down, next to something animated.

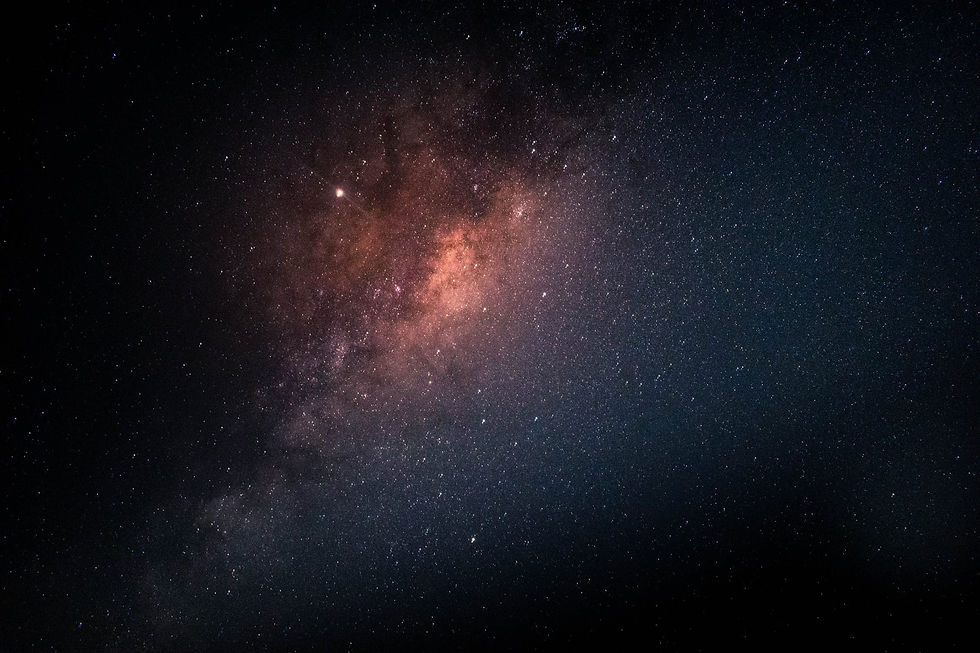
9.) I want this scene to be a more detailed space scene, and I have been watching videos on how to get this look, and most of the components are created fully within after effects, but you need a base star/nebula looking image, and so I have got this free image from a site called www.Pexels.com, of which you can get royalty free pictures. This is the picture I got from the website.
Now that the scenes were created, I needed to create the different assets that I would end up animating. The assets included the monkey suit, in which I wanted to animate walking, so I will need to create the limbs individually. Also different cars, so for this, I created a base body, and just coloured them differently when I needed them, as well as 1 tyre, in which I would pre-comp and duplicate. Other assets include the different stars that I will use in the space scene, as well as the lamp posts, accompanied by a lit light bulb to place on the lamp post, and a light ray for the lamp post to emit, that I can alter the opacity of to give it a see-through effect. For the individual assets, to get a .png file for them, I simply copy pasted them from Illustrator into Photoshop and saved the file as a .png, after deleting the background. Here is an example of the assets.


The first step to organizing the scenes, was linking the different scenes to different parts of the song. I placed the audio onto the timeline, and started with the cafe long shot scene. When I thought was a good point to transition to the next scene, I created a new composition, and followed on the audio track. I did this for all 9 scenes, so I now had 9 split up scenes, with the audio to go with them. This allows for smaller compositions, meaning less lag, and also they can be changed more easily, without changing the whole project. Next step was to set out the scenes. This involved setting up the different canvases, with the scenery, and putting the non-animated assets in place to begin with. This involved lamp posts, non-animated light and non-animated stars. Now that these were in place, I decided to create the animated pre-compositions for the first scene.
The first scene included 2 different pre-compositions, including a taxi driving across the scene, as well as a flickering lamp-post. The taxi pre-comp was very simple. First of all, I got the .png of the tyre I created in Illustrator, and made the anchor point the center, and then applied a rotation onto it, and attached the rotation onto the body of the car, so that when the cars body position was changed, the tire would automatically move. I sped this rotation up, and duplicated the tyre, and also attached it to the body. I then did a basic position change from one screen to the other. I then put this taxi pre-comp onto the main scene. The other pre-comp was the flashing lamp-post, of which is just putting the light bulb and light ray on top of the existing lamp post, and turning the layer on and off. I put a camera layer attached to a null object, and made the camera slowly zoom in throughout the time of the scene, for a cinematic effect. To finish off this scene, I applied CC rainfall to add rain onto the scene, the only value I altered was the wind position, to give a more realistic feel to the rain.
I have created a blog post explaining these steps, posted below;
The second scene was just a cafe scene, with a camera layer zooming into the menu board, in which I would put lyrics on at a later date. Apart from this, there was no other animation.
The third scene involved the coffee having steam coming out of it, and lyrics forming from the steam. There was no other animation on this scene.
The fourth scene is the city scene which involves lots of pre-comps. First of all, this scene includes the monkey suit, walking across the scene, and so to create this, I created a preset including all of the individual limbs I made within Illustrator. The different body parts include the head, body, right and left arms as well as right and left legs, and to finish off, the tail. To begin with I positioned them into place and then attached them onto the body, so that when the body was moved, the rest of the limbs would move as well. I then set a position time stamp, as well as
rotation time stamp, and positioned the limbs. I moved the time stamp by 1 second, and re-positioned the limbs. I then copy and pasted the position and rotation time stamp from 1 second before, and placed it 1 second after the second position, so it looked like the limbs were returning to their original position, I then did this a few time, so it looked like a very basic walking animation. The final step was the have the monkey suit walking from the left of the screen to the right, and this was done by changing the position of the body limb. I put the monkey suit walking into the composition, as well as putting in a flickering lamp post, and tried to flicker it every time the song said 'suit'. Last but not least, I modified the original car composition, and put it in the new scene. To finish off, I also applied more CC rainfall. Below is a blog post explaining this scene;
The fifth scene is the city scene number 2, of which is the main lyric scene. The only pre-comps on this scene was 4 different cars that drive past. I altered the original car pre-comp 4 times, and put them into the scene at different times. Below is another blog post explaining this scene.
The sixth scene is a basic desert long shot scene, where one of the pre-comped cars from the previous scene, with the monkey driving the car, drives across the scene. This scene is very basic, and transitions into the space scene. I did the transition by dragging the scene downwards, and having the blank sky layer I made, get dragged down at the same time the desert scene is getting dragged down.
The seventh scene is the space scene to match the part of the song. For this scene there are lots of pre-compositions of the stars, they are very basic pre-comps, that I will explain in a blog post below;
The eighth scene is the sea scene, and by this time I was running out of time to hand the project in, and so I had a change of plan for the lyrics on the part of the song. Instead of the moon's reflections creating the lyrics, I used the same lyric affects from the steamy coffee scene, but changed the colour to blue, to make it look like the lyrics are coming out of the ocean. The scene was very bare, and so I put in an animated camp fire next to the monkey suit, that I would eventually use to transition from the sea scene to the final space scene. The sea scene's opacity slowly changes to 0%, as well as the monkey suit and the logs from the camp fire, and the fire increases in size, and moves to the center of the screen, eventually changing to 0% opacity itself, and revealing the final space scene.
The ninth and final scene is the space nebula scene, of which was created within after effects. The scene also shows off the monkey suit person slowly spinning off into the void, of which was a combination of the limbs in different positions to the previous monkey suit, and the rotation of the monkey suit spinning endlessly into the void. The song ends here. Below is a blog post about the final scene.
Lyrics- To create most of the lyrics for this project, I simply just put the lyrics onto the screen, as soon as they have been sung in the song. I used a blocky font that matches the vector aesthetic of my artwork. I used a white colour on the font, to prevent colour matches, as well as being easy to read. I wrote in all capitals as I thought that it looked better, and again, easier to read. There are 2 scenes being the coffee steam scene and the sea scene, where I have applied wave warp to the font, as well as changing the starting positioning, scale and opacity, to make it look like the lyrics are forming and then rising like steam. I am happy with this effect, but I wish I had been more adventurous with the lyrics throughout the video. Although the words are very easy to read, and do their job, I think testing other effects would have improved the overall aesthetic, such as the lyrics bouncing in to the scene, or other movement affects applied onto them. I could have messed around with SABRE a lot more, but was limited on time. I also would have attempted my original plan of having the sea scene's lyrics projected onto the ocean by the moon, but I ran out of time as I was too ambitious.
Improvements- I think I could have definitely squeezed in 2 or 3 more scenes, if I wanted to, of which might have made the overall production more cinematic and professional. The second city scape, with the 4 cars and the majority of the lyrics, as well as the transition from the sea scene to the nebula scene at the end feels quite long, so I definitely could have added 2 more scenes in here. The pre-compositions look good, but perhaps I could have created more of them, to decorate the scenes a bit more, as they are quite bare as they are, which is fine, but the style of my cartoons are quite natural and boring as they are, so more animated details would have made the scenes more interesting and cinematic. There are also a few little technical difficulties that I had, involving the lamp mask, revealing the next scene, where I couldn't work out how to make the lamp cover the lyrics, so I had to delete the lyrics as the lamp post got near them, which doesn't look professional. There were a few other instances of this occurring, but better After Effects knowledge is all that could have fixed these mistakes.
Review-I sent the finished article to the artist, and he had nothing but appraisal for the work. He didn't expect a piece of work to this standard, especially within lock down, and so I was happy with this praise. He enjoyed the overall story line, but hinted that perhaps he would have preferred an ending in which the moral of the song was adventured into, of which is taking off designer clothes, but in my case, taking off the monkey suit. Better communication with the client will be something to work on next time. He was happy with the animation style, but also thought more variation in lyric animations and colours might look good.
Conclusion- Overall I am very happy with this project. It was my first ever lyric video, as well as being my first ever animation, on a big scale. I have learned a lot about after effects, as well as making lyric videos, and am sure I can use this information to improve upon future projects. I was also under a time constraint, due to my lack of time management, but I can definitely improve upon this for next time. I am happy with the art style, but think next time I will adventure out of my comfort box, and try to create a more detailed style, and not just vector graphics and shaped created within Illustrator. I will most likely use a few scenes from this project in my scissor reel, to showcase that I can produce basic animations.


Comments